Creating a Contacts Group
Contact Groups help organize contacts for various marketing strategies and campaigns. This tutorial will guide you through creating a group and adding contacts to it on both desktop and mobile platforms.
Prerequisites
Before starting this tutorial, ensure you have set-up of the following prerequisites. This is mandatory. Click the links below to learn more.
Navigation to Contact Groups
- Desktop: Click the 'Contact Group Icon' from the left side menu or go directly to it via this link: https://console.vastreach.com/contactgroups.
- Mobile: Click the Contact Group link text in the navigation (logo at the top left).
Understanding Your Contact Groups List With a New Account
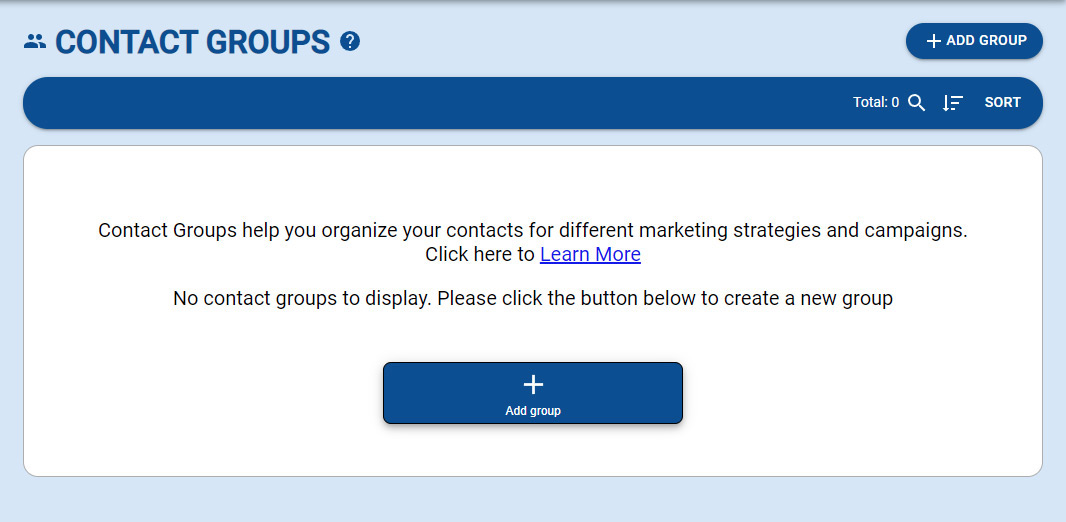
- Upon accessing the Contact Groups List page, a new account will show an empty list.
- Initiate group creation by clicking/tapping the '+ Add Group' button either at the center of the list or at the top right of the page.

Managing a Populated Contact Groups List
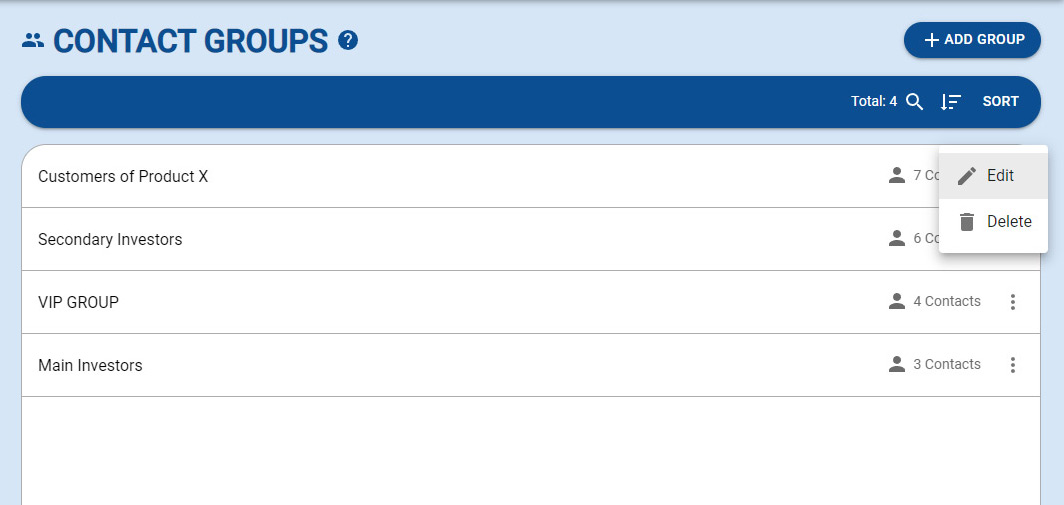
- Lists display each group's name, a contact icon (indicating the number of contacts), and an ellipsis icon for more options (Edit/Delete).

Using The Search & Filter Bar
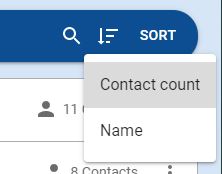
- Sort, filter, or search for specific contacts in your Contact Groups List.

Creating a Group
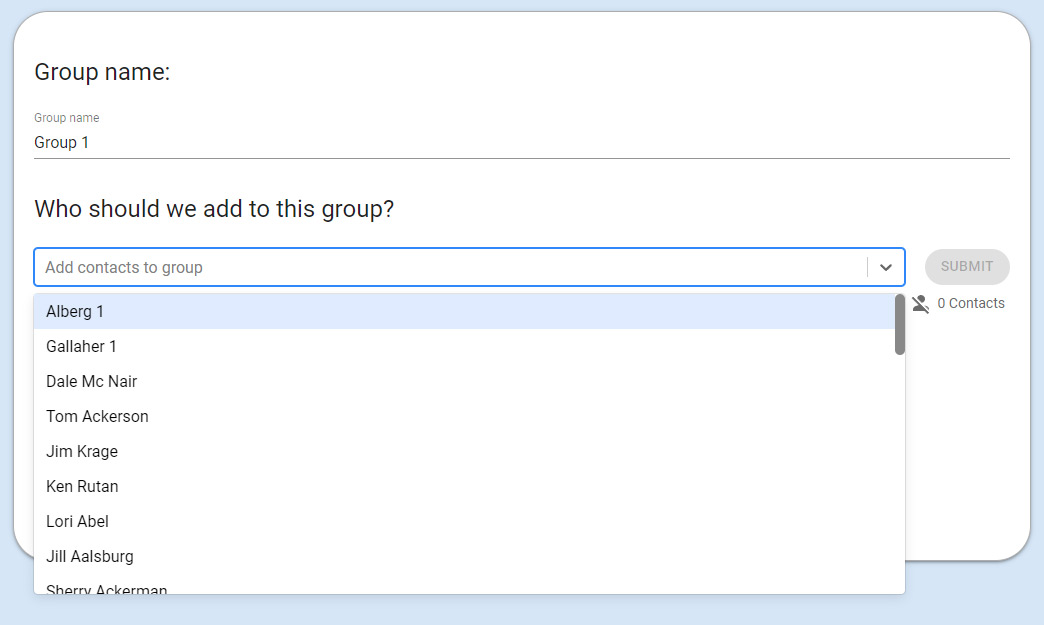
- Navigate to the group creation page by clicking/tapping '+ ADD GROUP'.
- Enter the group name in the input text box.
- Select contacts to add to this group. (If no contacts are available, create one from the contact list.)
- Once contacts are added, the 'SUBMIT' button at the top right will become active.
- Click/Tap 'SUBMIT' to create the group.
- Note: At least one contact is required for the 'SUBMIT' button to activate. Groups can be auto-saved without contacts if a name is provided.

Do's and Don'ts
Do:
- Remember a group requires a name to be created, but can exist without contacts.
Don't:
- Avoid using contacts with mixed information (e.g., some with only emails or phone numbers) to prevent incomplete campaign reach.