ACCOUNT SETTINGS TUTORIAL FOR DESKTOP AND MOBILE
Overview
Account Settings allows you to set up a business name, default email address, mailing address, and ReCaptcha. These settings auto-fill sections of emails, text messages, forms, etc., saving you time. This tutorial covers setting up Account Settings & Preferences on both Desktop Computers/Laptops and Mobile Devices.
Prerequisites
Before setting up Account Settings, ensure you have set up your Subscription Settings. This is mandatory. Click here to learn more.
Navigation to Account Settings
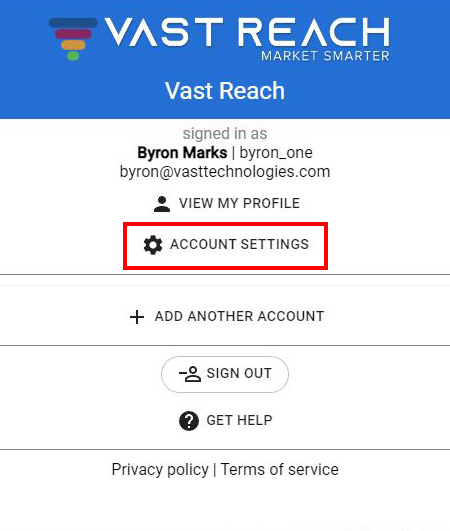
- Desktop/Mobile: Access Account Settings by selecting the icon button at the top right. Next click the Gear Icon with the text 'Account Settings'. Alternatively on desktop, you can use the link: https://console.vastreach.com/accountsettings.

Setting Up Account Settings Page
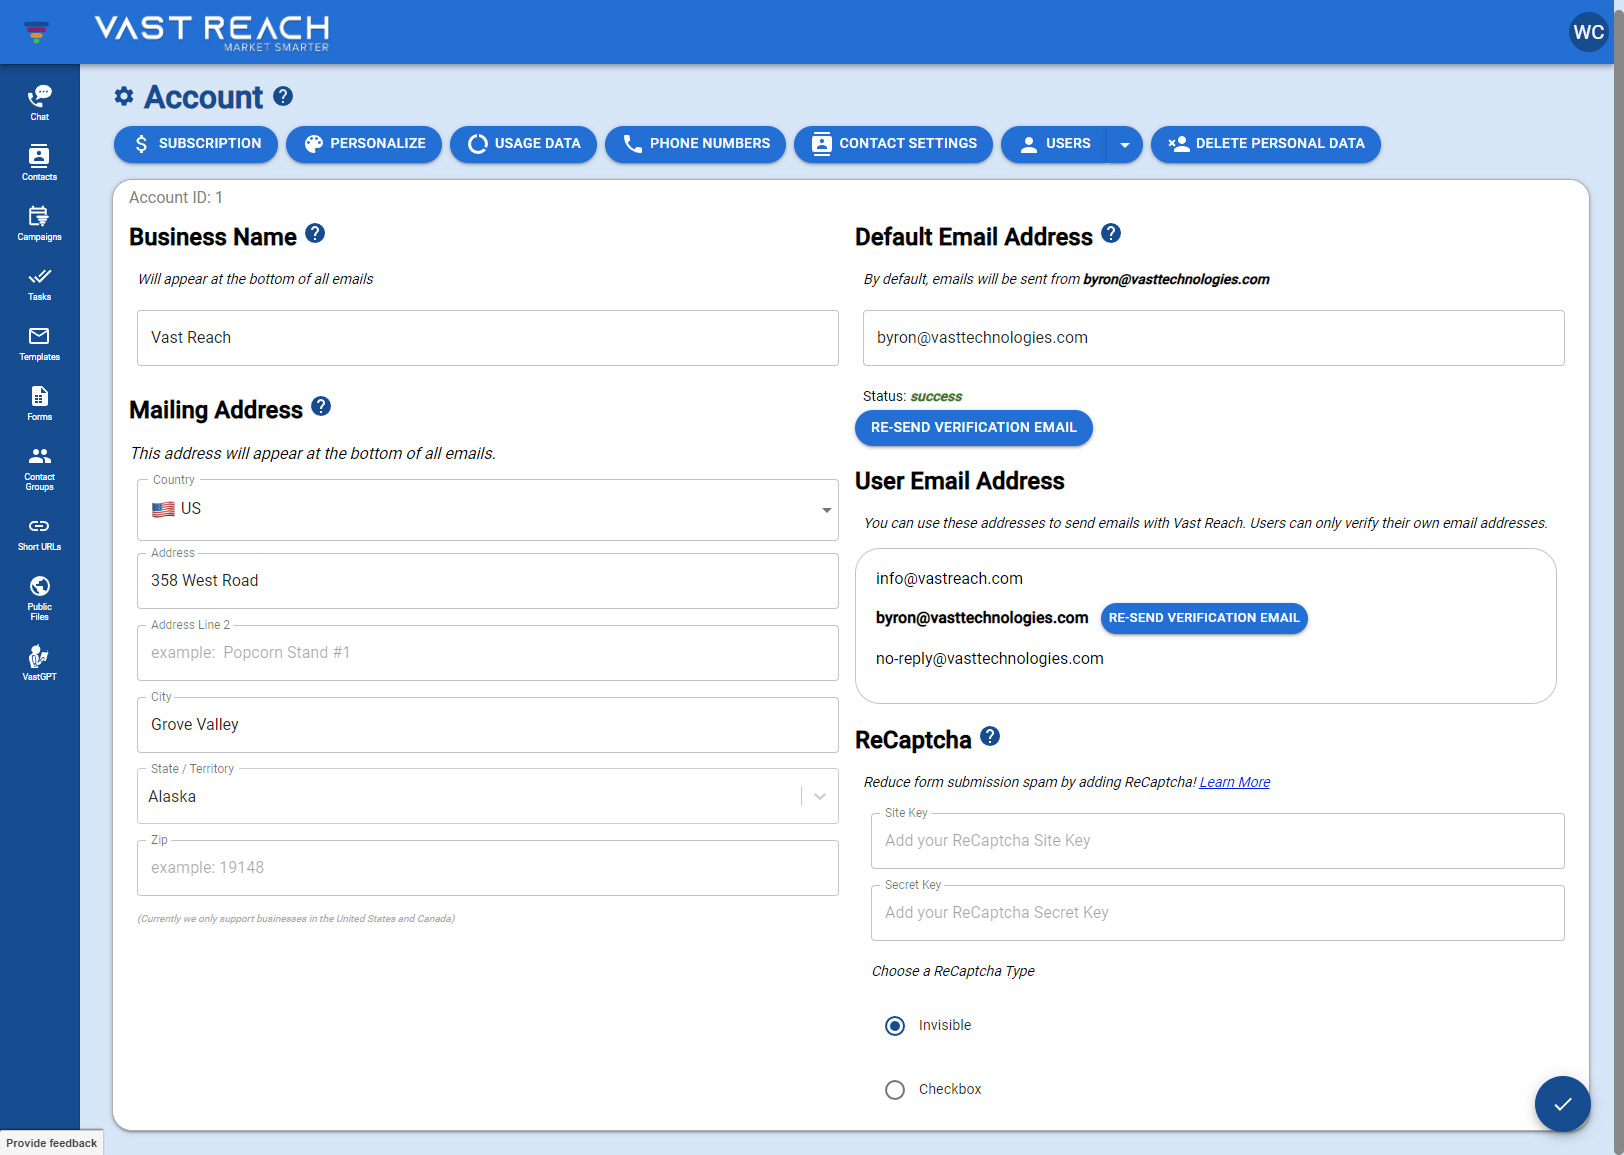
- Business Name: Enter your Business Name, which will appear at the bottom of your emails.
- Default Email Address: Fill out the Default Email Address. Verify your email by clicking 'SEND VERIFICATION EMAIL'. Once verified, the status should show a green success message.
- Mailing Address: Fill out the Mailing Address under the Business Name section. This is a legal requirement for email compliance (Can Spam Act). Learn more.
- User Email Address: Add and verify your user email addresses for sending emails.
- Delete My Personal Data: Option to delete user data permanently, affecting Vast Reach usage.
- Setting Up ReCaptcha: Set up ReCaptcha to prevent spam on forms. Click here to learn how. Save settings using the Blue floating-action button with a Check icon.

Do's and Don'ts
Do: Set up ReCaptcha for your forms.
Don't: Forget to verify your email.
Additional Features
Explore buttons at the top of the page for more features. Tutorials for these can be navigated to/from the links below.